图像处理模块
更新: 2025/2/24 字数: 0 字 时长: 0 分钟
基础入门
入门知识
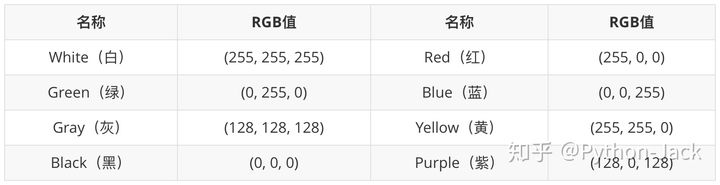
颜色:如果你有使用颜料画画的经历,那么一定知道混合红、黄、蓝三种颜料可以得到其他的颜色,事实上这三种颜色就是美术中的三原色,它们是不能再分解的基本颜色。在计算机中,我们可以将红、绿、蓝三种色光以不同的比例叠加来组合成其他的颜色,因此这三种颜色就是色光三原色。在计算机系统中,我们通常会将一个颜色表示为一个RGB值或RGBA值(其中的A表示Alpha通道,它决定了透过这个图像的像素,也就是透明度)。
**像素:对于一个由数字序列表示的图像来说,最小的单位就是图像上单一颜色的小方格,这些小方块都有一个明确的位置和被分配的色彩数值,而这些一小方格的颜色和位置决定了该图像最终呈现出来的样子,它们是不可分割的单位,我们通常称之为像素(pixel)。**每一个图像都包含了一定量的像素,这些像素决定图像在屏幕上所呈现的大小,大家如果爱好拍照或者自拍,对像素这个词就不会陌生。
Pillow模块
Pillow是由从著名的Python图像处理库PIL发展出来的一个分支,通过Pillow可以实现图像压缩和图像处理等各种操作。可以使用下面的命令来安装:
text
pip install pillowPillow中最为重要的是 Image 类,可以通过 Image 模块的 open 函数来读取图像并获得 Image 类型的对象:
python
# 引入Image类
from PIL import Image

# 读取图像获得Image对象
image = Image.open('image.jpg')
# format属性获得图像的格式
print(image.format)  # 输出:JPEG
# size属性获得图像的尺寸
print(image.size)    # 输出:(500, 750)
# mode属性获取图像的模式
print(image.mode)    # 输出:RGB
# thumbnail方法直接对原图进行修改(保持图像宽高比,只能缩小不能放大,图片不会被拉伸),生成指定尺寸的缩略图,可能会出现空白区域
image.thumbnail((image.size[0] * 0.4, image.size[1] * 0.4))
# putpixel方法修改图像指定像素点(128, 128, 128)
for x in range(80, 310):
    for y in range(20, 360):
        image.putpixel((x, y), (128, 128, 128))
# crop方法指定图像的剪裁区域
image_crop = image.crop((80, 20, 310, 360))
# 读取另一张图像获得Image对象
img = Image.open('image.png')
# resize方法返回修改尺寸后的图片对象(不会保持图像宽高比,可放大缩小,图片可能会被拉伸),而原图片对象没有被修改
new_img = img.resize((1000, 1000))
# paste方法将剪裁区域粘贴到另一张图像上的(172, 40)位置
new_img.paste(image_crop, (172, 40))
# rotate方法实现图像的旋转
new_img.rotate(45)
# transpose方法实现图像翻转(FLIP_LEFT_RIGHT左右翻转、FLIP_TOP_BOTTOM上下翻转)
new_img.transpose(Image.FLIP_LEFT_RIGHT)
# show方法显示处理后的图像
new_img.show()Pillow中有一个 ImageFilter 模块,包含了诸多预设的滤镜(CONTOUR 轮廓滤镜、EMBOSS 浮雕滤镜、GaussianBlur 高斯模糊【参数值越大越模糊】)也可以自定义滤镜:
python
# 引入ImageFilter模块
from PIL import Image, ImageFilter

# 读取图像获得Image对象
image = Image.open('image.jpg')
# filter方法对图像进行轮廓滤镜处理
image.filter(ImageFilter.CONTOUR)Pillow中有一个名为 ImageDraw 的模块,该模块的 Draw 函数会返回一个 ImageDraw 对象,通过 ImageDraw 对象的 arc、line、rectangle、ellipse、polygon 等方法,可以在图像上绘制出圆弧、线条、矩形、椭圆、多边形等形状,也可以通过该对象的 text 方法在图像上添加文字。
python
import random
from PIL import Image, ImageDraw, ImageFont

def random_color():
    """生成随机颜色"""
    red = random.randint(0, 255)
    green = random.randint(0, 255)
    blue = random.randint(0, 255)
    return red, green, blue

width, height = 800, 600
# 创建一个800*600的图像,背景色为白色
image = Image.new(mode='RGB', size=(width, height), color=(255, 255, 255))
# 创建一个ImageDraw对象
drawer = ImageDraw.Draw(image)
# 通过指定字体和大小获得ImageFont对象
font = ImageFont.truetype('Kongxin.ttf', 32)
# 通过ImageDraw对象的text方法绘制文字
drawer.text((300, 50), 'Hello, world!', fill=(255, 0, 0), font=font)
# 通过ImageDraw对象的line方法绘制两条对角直线
drawer.line((0, 0, width, height), fill=(0, 0, 255), width=2)
drawer.line((width, 0, 0, height), fill=(0, 0, 255), width=2)
xy = width // 2 - 60, height // 2 - 60, width // 2 + 60, height // 2 + 60
# 通过ImageDraw对象的rectangle方法绘制矩形
drawer.rectangle(xy, outline=(255, 0, 0), width=2)
# 通过ImageDraw对象的ellipse方法绘制椭圆
for i in range(4):
    left, top, right, bottom = 150 + i * 120, 220, 310 + i * 120, 380
    drawer.ellipse((left, top, right, bottom), outline=random_color(), width=8)
# 显示图像
image.show()
# 保存图像
image.save('result.png')